Let clients sign themselves up
Templates decide what a new client instance contains on day one. A signup link lets your clients create one themselves, within limits you set.
Verified on August 14, 2026
Adding clients by hand works until it does not. On a multi-tenant environment you can hand out a signup link instead: your prospect opens it, fills in a short form, and gets their own instance.
Two pieces make that work. A template decides what the new instance contains. The link decides who may use it and how many times.
Templates: what a new instance starts with
A template is a named starting point on this environment — the modules, the configuration and, if you have prepared one, a ready-made database to copy. Without it a new instance is an empty Odoo that someone has to set up; with it, it already looks like your product.
A template can carry a price and a trial length, and it does not have to. An unpriced template is useful for evaluations and for clients you invoice outside the platform.
Two switches decide where a template is offered. Published puts it in your own client portal. Listed additionally offers it on the public marketplace, alongside other integrators'. Neither is on by default: preparing a template and offering it for sale are separate decisions.
The link, and the limits on it
A signup link is a URL with a token in it. Creating one asks for a label, the template it starts from, and the limits you want.
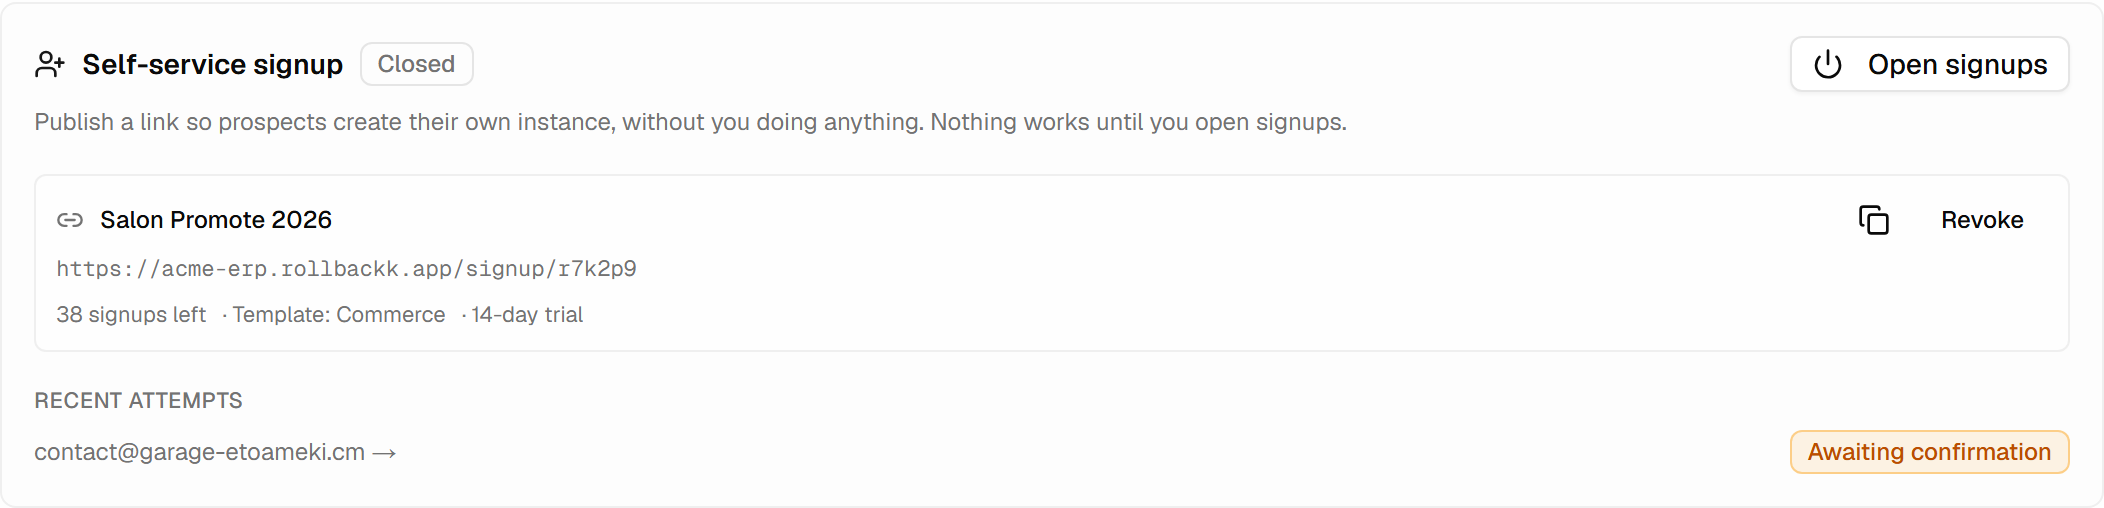
Four limits, each refused with its own reason when someone hits it:
| Limit | What the visitor is told |
|---|---|
| Turned off | This invitation has been turned off. |
| Past its expiry date | This invitation has expired. |
| Signup count reached | This invitation has reached its limit. |
| Wrong email domain | The address is not accepted for this invitation. |
An unknown token gets a flat, uninformative answer. A valid token that is closed gets the real reason — someone holding a link you handed out has already proved they were invited, and a vague error would only make them try again.
You can also require the visitor to confirm their email address before anything is created, which is the difference between a link you send to a known prospect and one you put on a stand at a trade fair.
What the visitor goes through
They open the link, give an email address and a name for their instance, and confirm their address if you asked for it. What happens next depends on how you set the link up: either the instance is created directly, or a request appears in this panel for you to approve.
One detail worth knowing: a second signup from an address that already has a live instance on this environment is refused — but a failed one does not block anything. Someone whose first attempt broke is exactly the person who needs to be able to try again.
Requests waiting for you
Requests that need a decision are listed under the links. Approving one creates the instance exactly as if you had added it by hand, including the one-time administrator password described in the guide on client instances.
This is the point at which a prospect becomes a client on your environment, consuming your resources — so it is worth treating the list as a queue with an owner rather than something to check occasionally.
Turning it off
Self-service is a switch on the environment, and turning it off closes every link at once without deleting them. Individual links can be turned off on their own, and both are reversible.
Instances created through a link are ordinary instances afterwards: same list, same suspend and resume, same upgrade wave. Nothing about them stays special because of how they arrived.
Seeing this panel needs tenant.view; creating links and approving requests needs tenant.manage.